In this article, we will learn how to prioritize high-quality UX design when building an MVP.
Testing assumptions early is a necessity when designing new products. As UX designers, we want to test assumptions and hypotheses as early as possible in the design process. MVP builds are designed to create the absolute, minimally-viable product—one which creates the smallest feature set that a customer would pay for, or even just use.
Instead of designing a fully-featured product which addresses the needs of every possible user type, the focus is narrowed on the most important pain points of a user group, and the MVP aims to solve just for that user group early on.
What is a Minimum Viable Product
Eric Ries defined an MVP as that version of a new product which allows a team to collect the maximum amount of validated learning about customers with the least effort. This validated learning comes in different forms which includes; whether your customers will actually purchase your product.
An important lesson behind the idea of an MVP is that you build an actual product (which may be no more than a landing page, or a service with an appearance that is fully automated) that you can offer to customers and observe their actual behavior with the product or service. It often has a limited set of features, just enough that it works, and is production-ready to be put in front of your users or target audience.
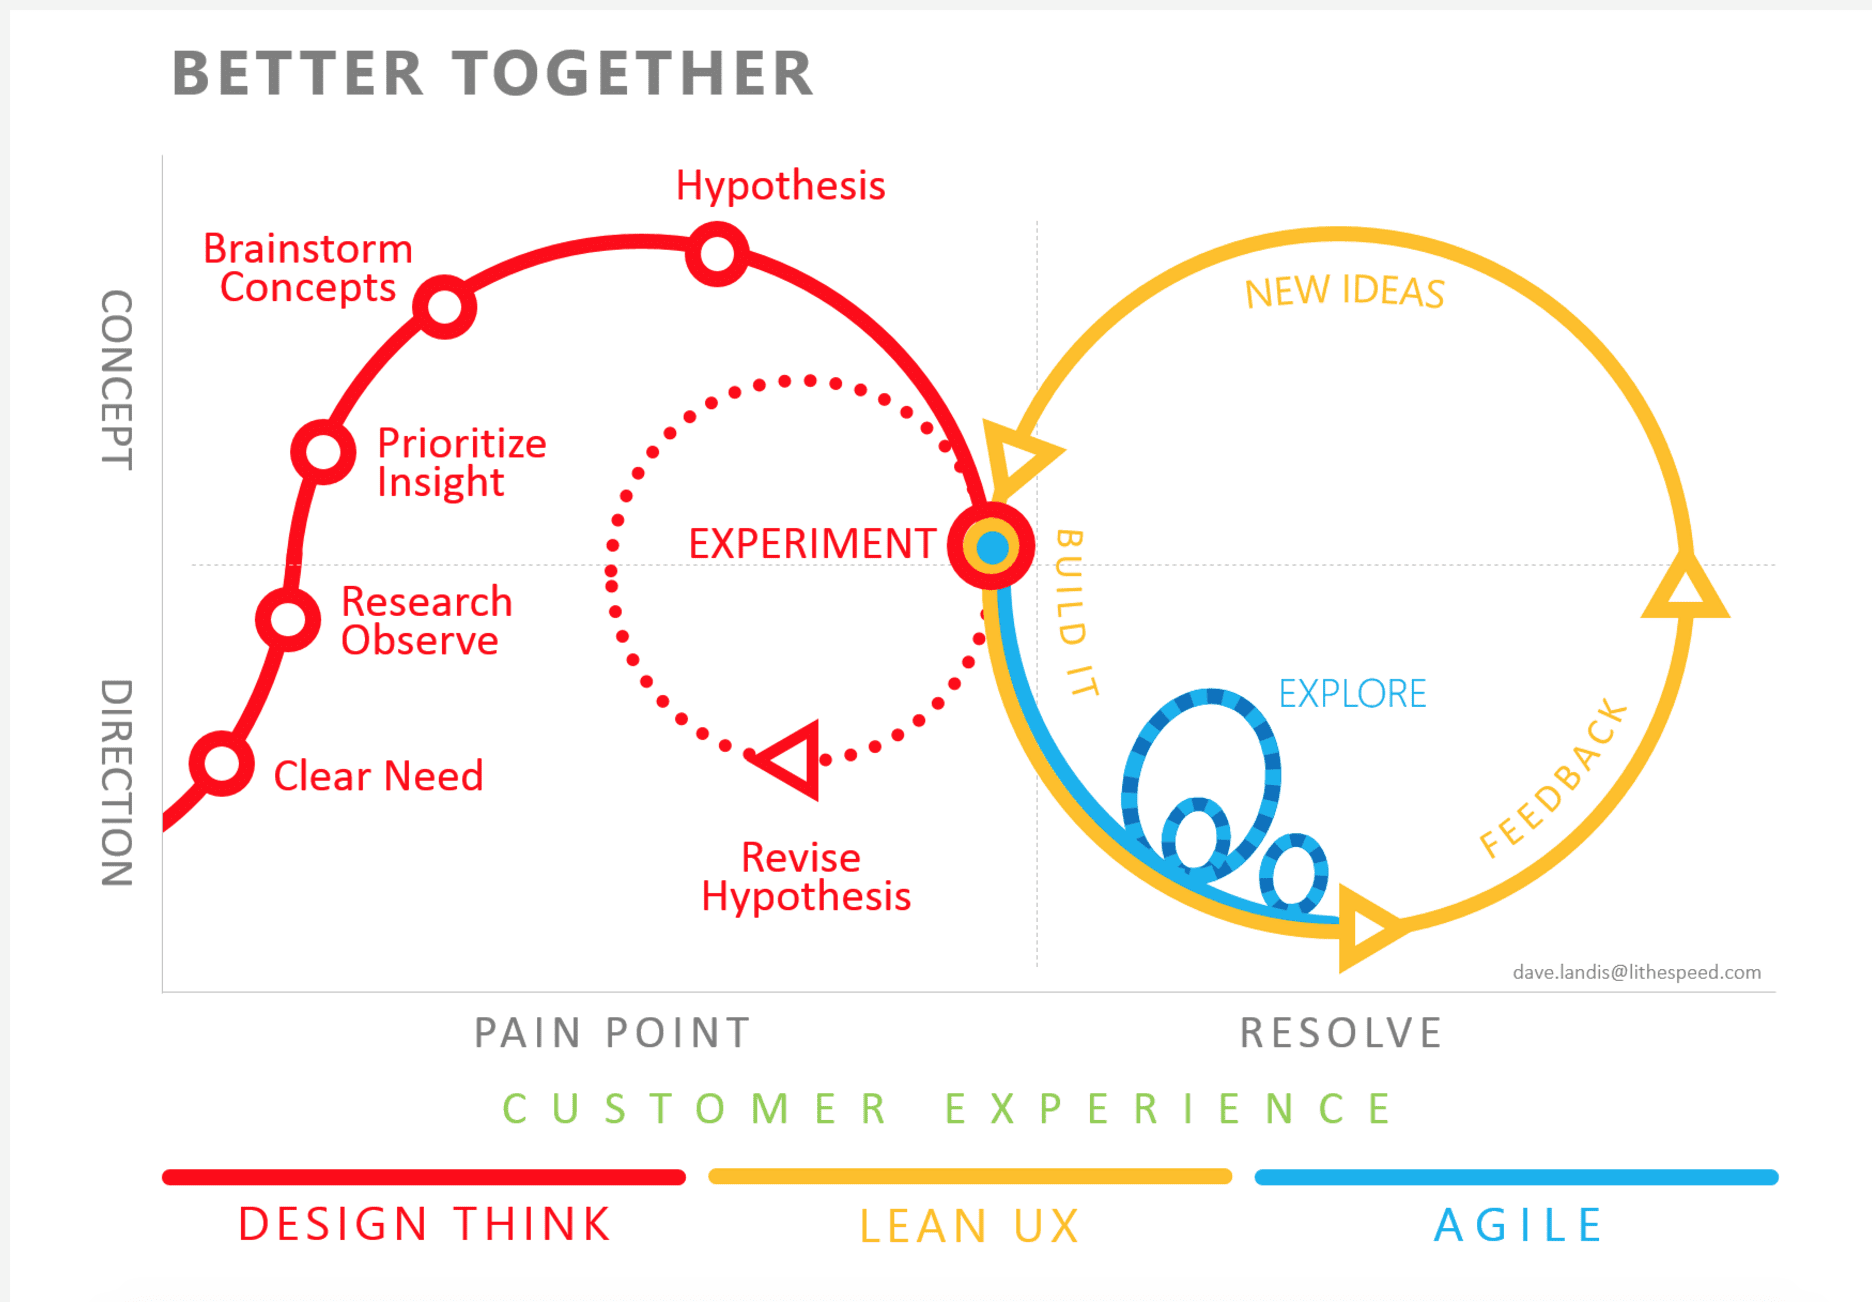
MVP methodology can be summed up as Build (or Prototype), Measure, Learn and then iterating and refining the product based on your learnings. This process can also be found to be often used in startups and Agile environments.

The Design Thinking and Lean UX process in an Agile environment (Dave Ladis)
MVP product or UX design iterations are usually based on customer feedback and statistical data. This helps the product and company save money, as well as provide relevant solutions to their users as fast as possible.
The Role of UX in Developing a Minimum Viable Product
According to Statista, 42% of startups fail because of no market or customer need. To avoid this, your product should be in its best form even as an MVP, in a way that its functionalities are tailored to the most relevant user needs and expectations.
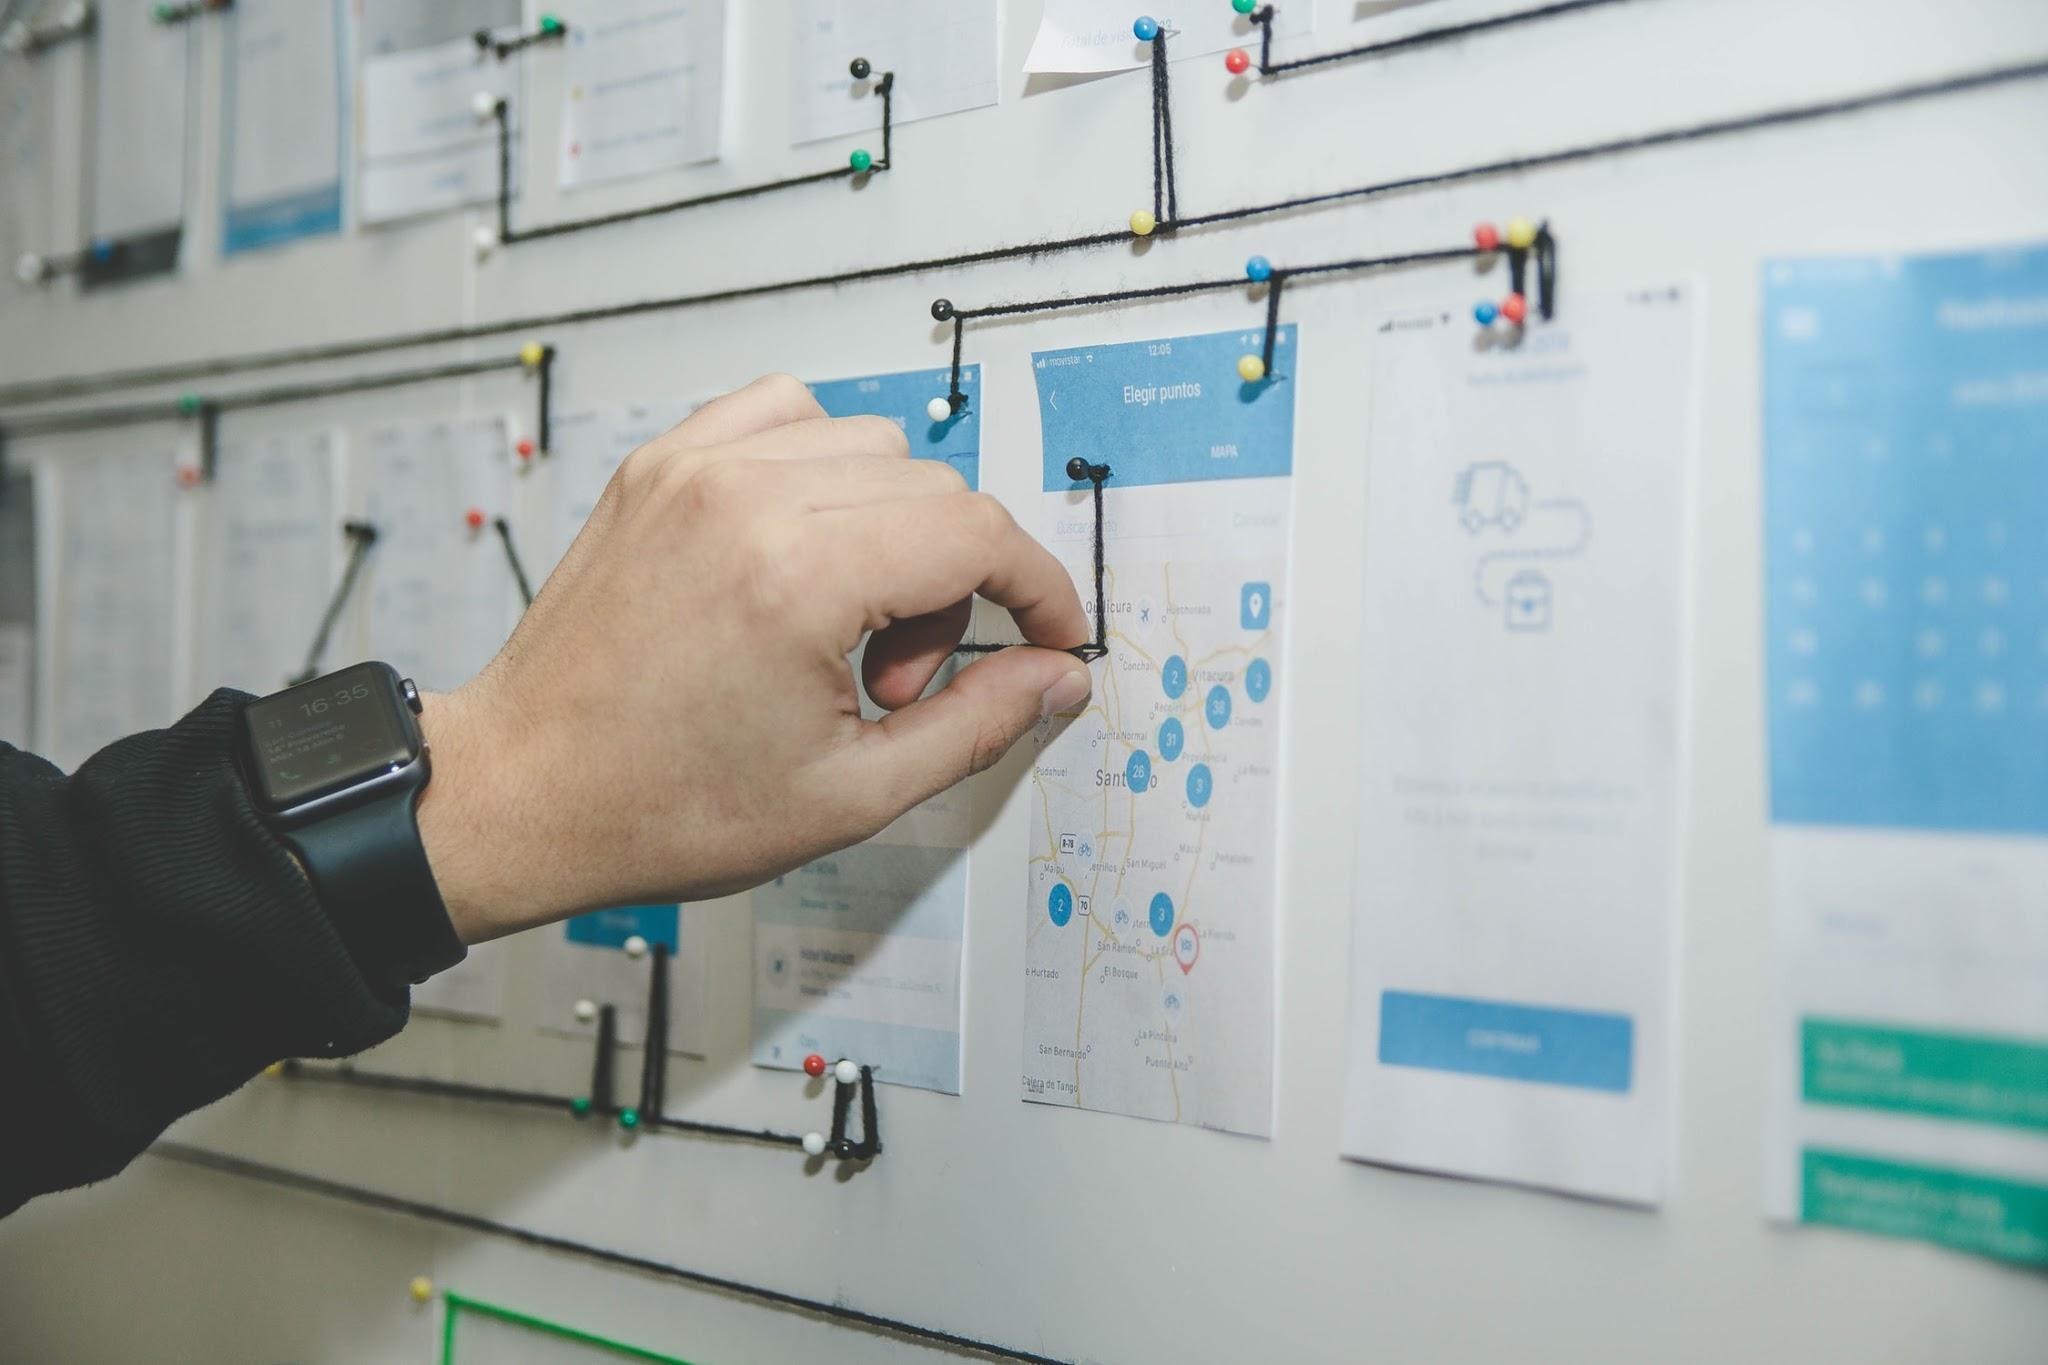
In addition to the features themselves, your product must demonstrate to your users a smooth user experience of usability in order to make a good first impression. As a result, a well-thought-out UX design for a minimum viable product of your website or SaaS application often becomes one of the main factors for a successful project. Using early pre-MVPs can also be useful for mapping out user journeys.
Once some initial feedback is gathered, as a UX designer, you can get a better sense of what people really want in a product. This is invaluable for mapping out how to get them from point A (their problem) to point B (the ideal solution). Designers may find that there are more steps required along that map than they initially thought, or less.

A pre-MVP mock up image.
Key steps to designing an MVP with UX Design
There are certain key steps to take when designing an MVP. To visualize this process, we will now get into the specifics of the UX design process for an MVP.
1. Always start with market research
No matter what product you are going to build, your first and foremost task is to analyze the market. You have to make sure that your idea fulfills the requirements of your core audience. Analyze UX in your competitors’ solutions. Analyze and synthesize your research findings in order to make sure the user would be at the center of the product.
Moreover, conducting online surveys and in-depth interviews with target audience representatives to gather as many insights as possible can be of great help when carrying out product or market research. Tools like UXtweak are helpful for carrying and automating the product and market research phase for small and large teams.
2. Define the values of your product with a PRD
The task here is basically to decide and finalize what values your product offers and how to present them, providing the best UX for your MVP. The first step in the MVP development process is defining the product’s purpose, features, functionality, and behavior with a product requirements document. You want to build your MVP based on these values and the most effective visualization of them. The PRD is the project’s single source of truth, aligning the product team around the user’s problem.
It should include:
- The objective (problem statement).
- Ideation information (user personas, user stories, and epics).
- Analysis (assumptions, constraints, and success metrics).
3. Create UI/UX design for your MVP
Focus on implementing only the essential functionality, ensuring a one-to-one correspondence with the graphical elements that denotes and activates it. You can start by labeling and organizing the app’s digital content, such as sections, pages, and features. The result of this process is called information architecture (IA) and can be broken down into two parts:
- Defining the product’s content; and
- Determining the content’s hierarchy.
There are websites that can also help you with pre-designed flow solutions which you can use or follow to organize your product’s content in your design. An example of one is Mobbin, a UX pattern search solution for mobile apps, which can help you find the ready-to-use UX templates for your MVP.
4. Design features for your MVP using mapped out UX Design
The next would be to integrate features into your product based on the created MVP UX design. Think about your users and define what features they will appreciate most of all. Categorize them based on their importance (high, medium, and low priority).
5. Map out user flow
You need to build UX in the MVP development process with the users in mind. Look at your product from their perspective, from opening the app to doing the target action. To map up your user flow, you need to define the primary process stages.
You should focus on the main tasks that typically look like creating an account, buying goods, managing orders, working with documents, searching the data, watching the statistics, etc. When you identify your main procedure stages, it will be easier to define the main features needed for each step.
6. Implement pre-launch product testing
Building a powerful, user-friendly, and engaging product is a time-consuming process that needs to be subdivided into a few sections. After you build your MVP product, it needs to undergo testing. Our MVP process involves the “measure, learn, repeat” user testing approach in order to identify and fix potential friction points early on.
There are several types of tests that you can deploy, however, in this article we’ll talk about two types of tests which are moderated and unmoderated and how they can be used to collect the most feedback and understand how your product performs in front of users.
- Moderated testing for qualitative data: By observing users to understand how they complete a task and asking follow-up questions, moderated testing offers a direct usability assessment through qualitative data. The advantage of this type of testing? We know exactly which aspects of the task are problematic.
- Unmoderated testing for quantitative data: By measuring users’ performance on a given task, unmoderated testing offers an indirect usability assessment through quantitative data. The advantage of this type of testing? You can get sound statistical feedback about a problem with no “random” results that might impact the response to that problem.
Using this collective feedback, you can get more useful feedback from online user interviews that are personal with more accurate responses which will help you build a more user-friendly MVP.
Moderated testing process.
7. Launch the MVP
In this final stage, you want to confirm that everything looks as expected and runs smoothly by clicking through the prototype and verifying that the MVP resonates with the initial product concept which is:
- The user flow feels natural.
- All use cases have been considered.
- All development bugs have been fixed.
You can then launch the MVP, but beware that an MVP shouldn’t be of poor quality as compared to your final product.
Infuse UX when building your next Minimum Viable Product
All in all, the main intention behind designing and building an MVP for startups is to launch it and see what your users will say, analyze their reaction, and gain feedback. Overall, it’s a superb solution to test the product and focus on building options/better features that will surely have better value. Designing a user experience for a minimum viable product can also save you money.
The UX MVP process—from ideas to building a functional prototype to measuring and learning from real people is an iterative process that can be implemented over and over again to create an optimal product. The process itself is simple and straightforward, and works well whether you as a designer are working solo or with a team.
The resulting product will address people’s pain points while also creating a pleasurable experience. Building products using the UX MVP methodology gives designers a clean roadmap for the entire process. From ideation through iterations based on real customer feedback, this method makes design more efficient and less wasteful.
Register for your free account at UXtweak and find out what users actually think about your product!


